Check out Part 1 of this three-part-series about painting “Beautiful Day in the Neighborhood” to learn what inspired it. Today, I want to talk about how I designed and built the cookie/frosting model I used as my painting reference. (You can check out Part 3, the Painting Process, here.)
“Beautiful Day in the Neighborhood” will be part of my March 2026 solo exhibition at Hidell Brooks Gallery in Charlotte, North Carolina.
Please contact Hidell Brooks to schedule a viewing, March 6-27.
The Design Process
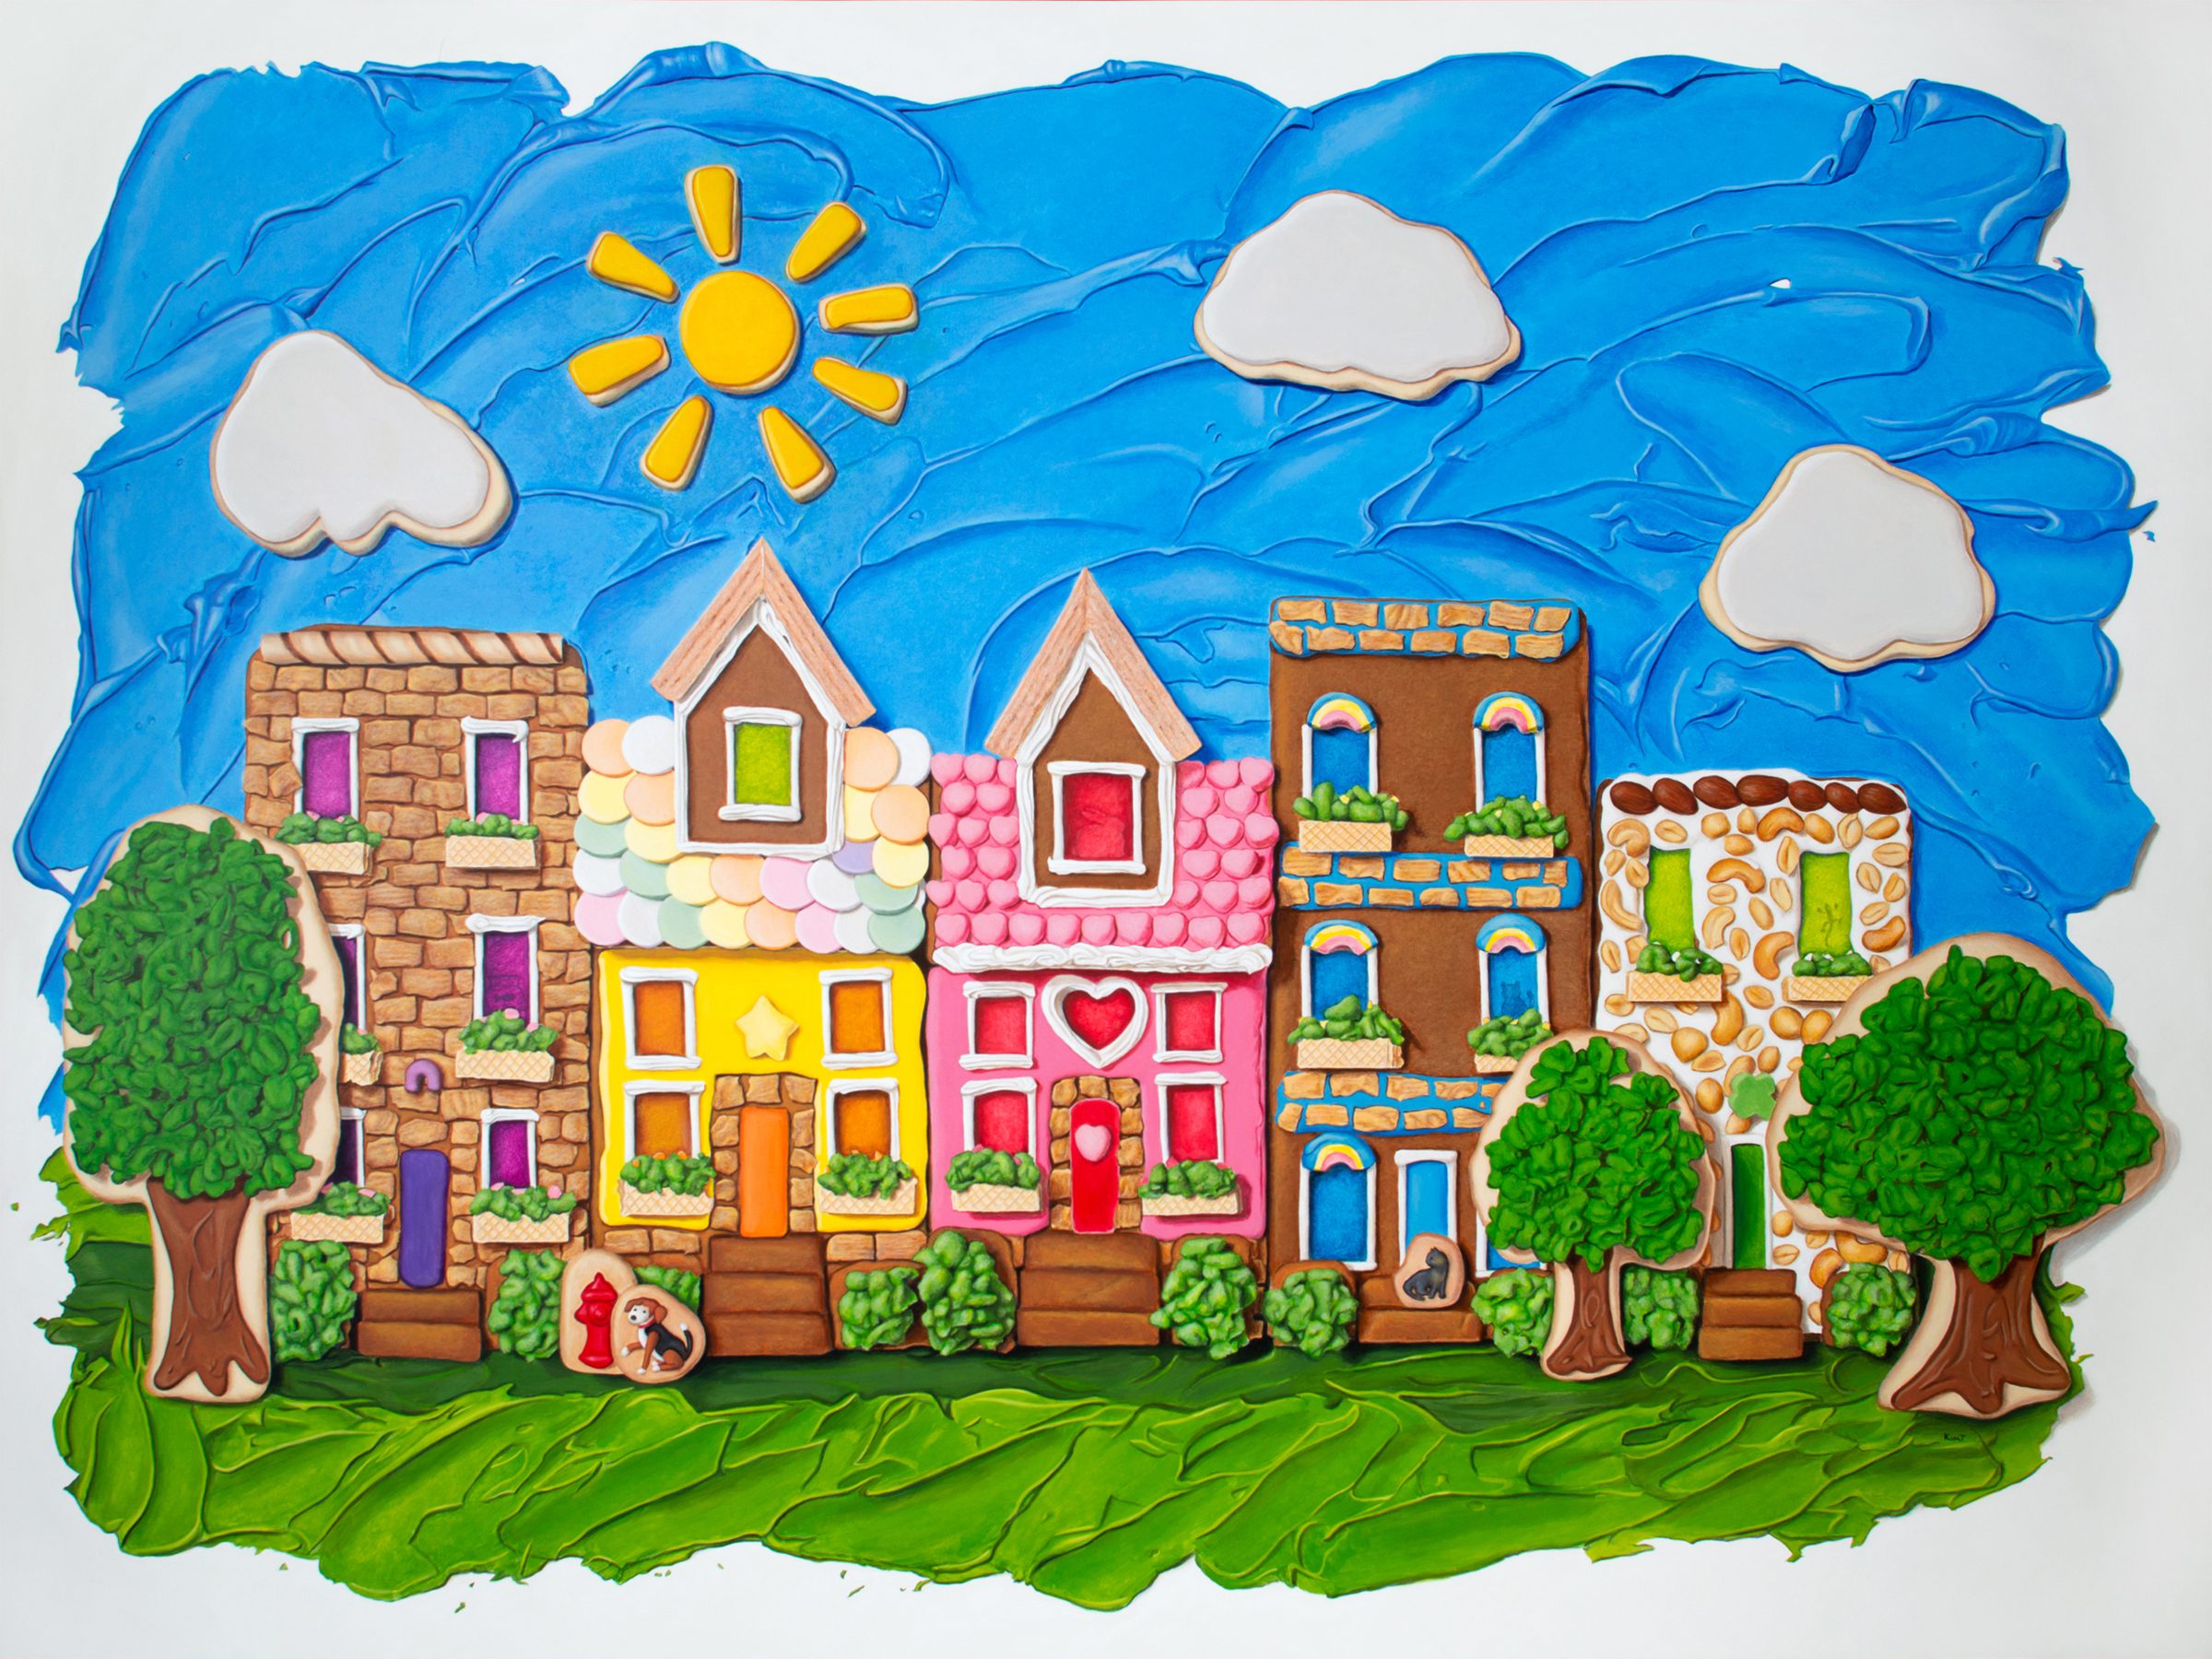
For those of you who haven’t encountered my work before, and specifically this new series of trompe l’oeil food paintings: I design, bake and decorate a real-life cookie/gingerbread/frosting model and then use it as the reference for a flat trompe l’oeil painting. Complicated? Yes. Time-consuming? Yes. Magical? Oh yeah. So let’s get into how I designed this painting, “Beautiful Day in the Neighborhood,” 36″ x 48″, which is, to date, my largest trompe l’oeil food painting.
I had a general idea that I wanted to paint a bunch of adjacent cookie buildings for probably at least six or eight months before I arrived at the design I actually used. This started with just some fleeting thoughts and sketches in my sketchbook.
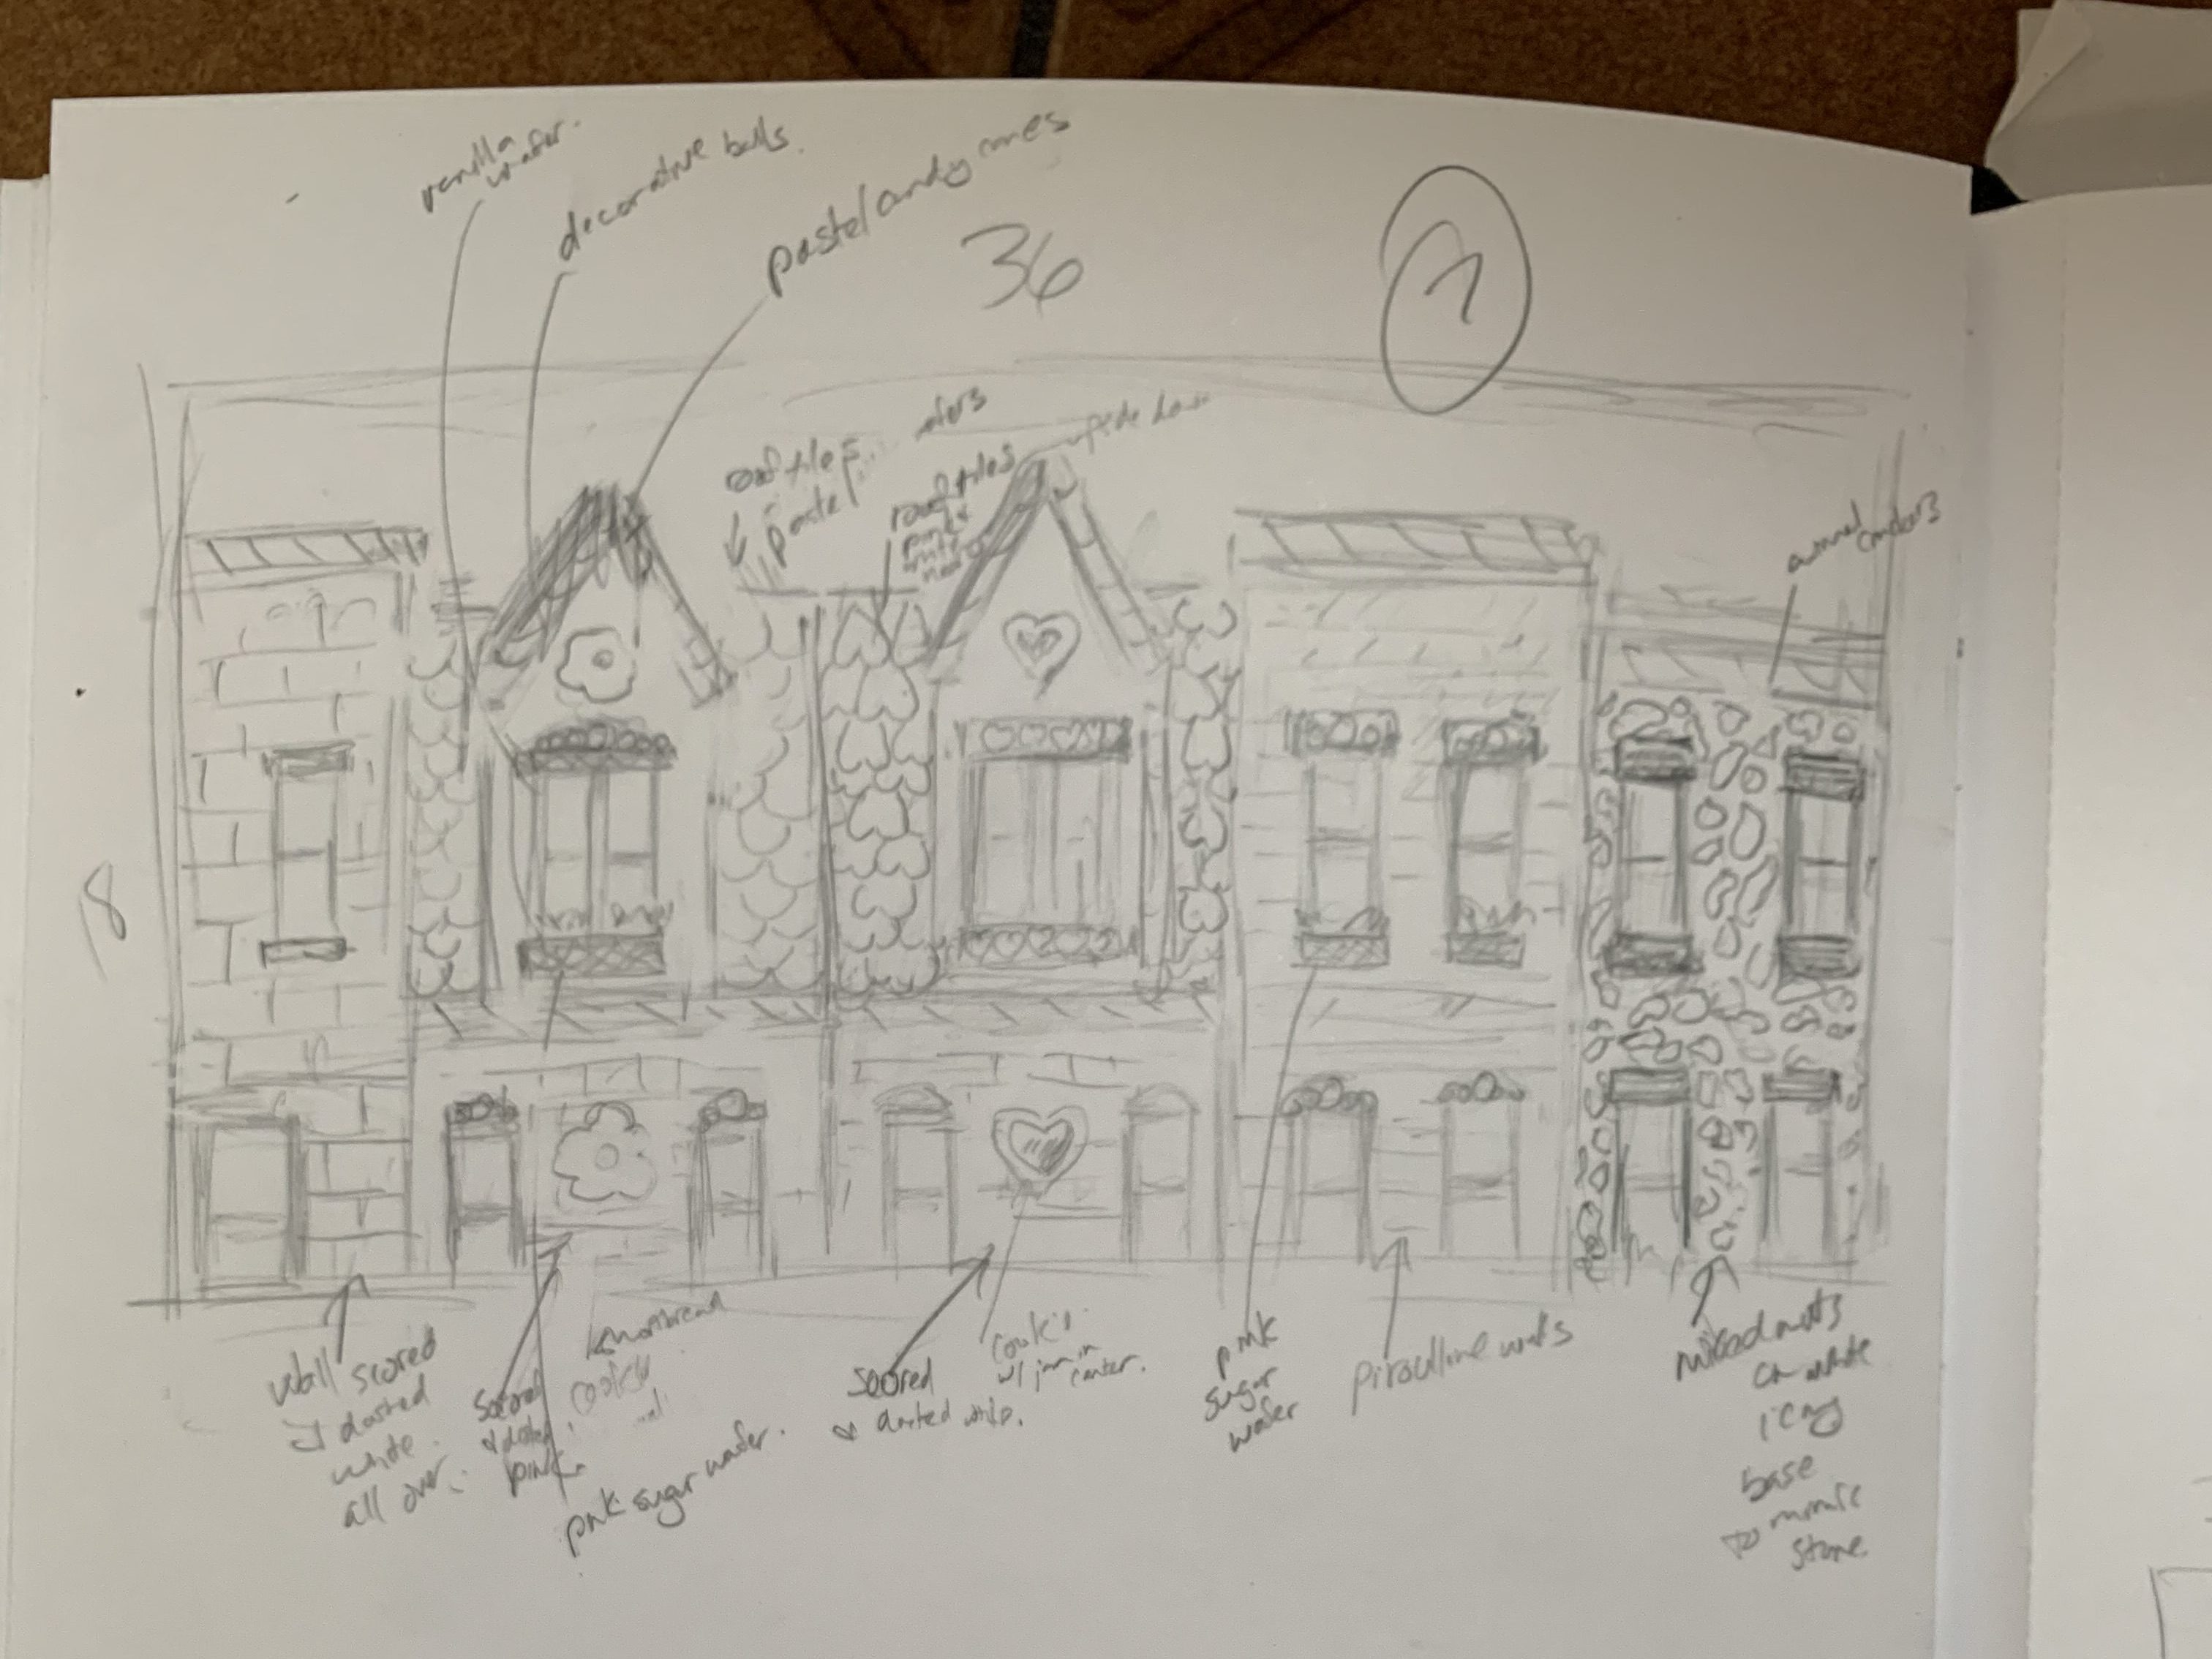
I don’t know why exactly, but I created this unofficial rule for myself with these new pieces that anything based on a manmade thing (like a building) should be made of gingerbread, whereas anything that was organic or alive (like an animal or tree) should be made of sugar cookie or shortbread cookie. It helps me to keep my designs and cookie models a bit more organized, I suppose, but in my mind, it also keeps things a bit more intentional, too.
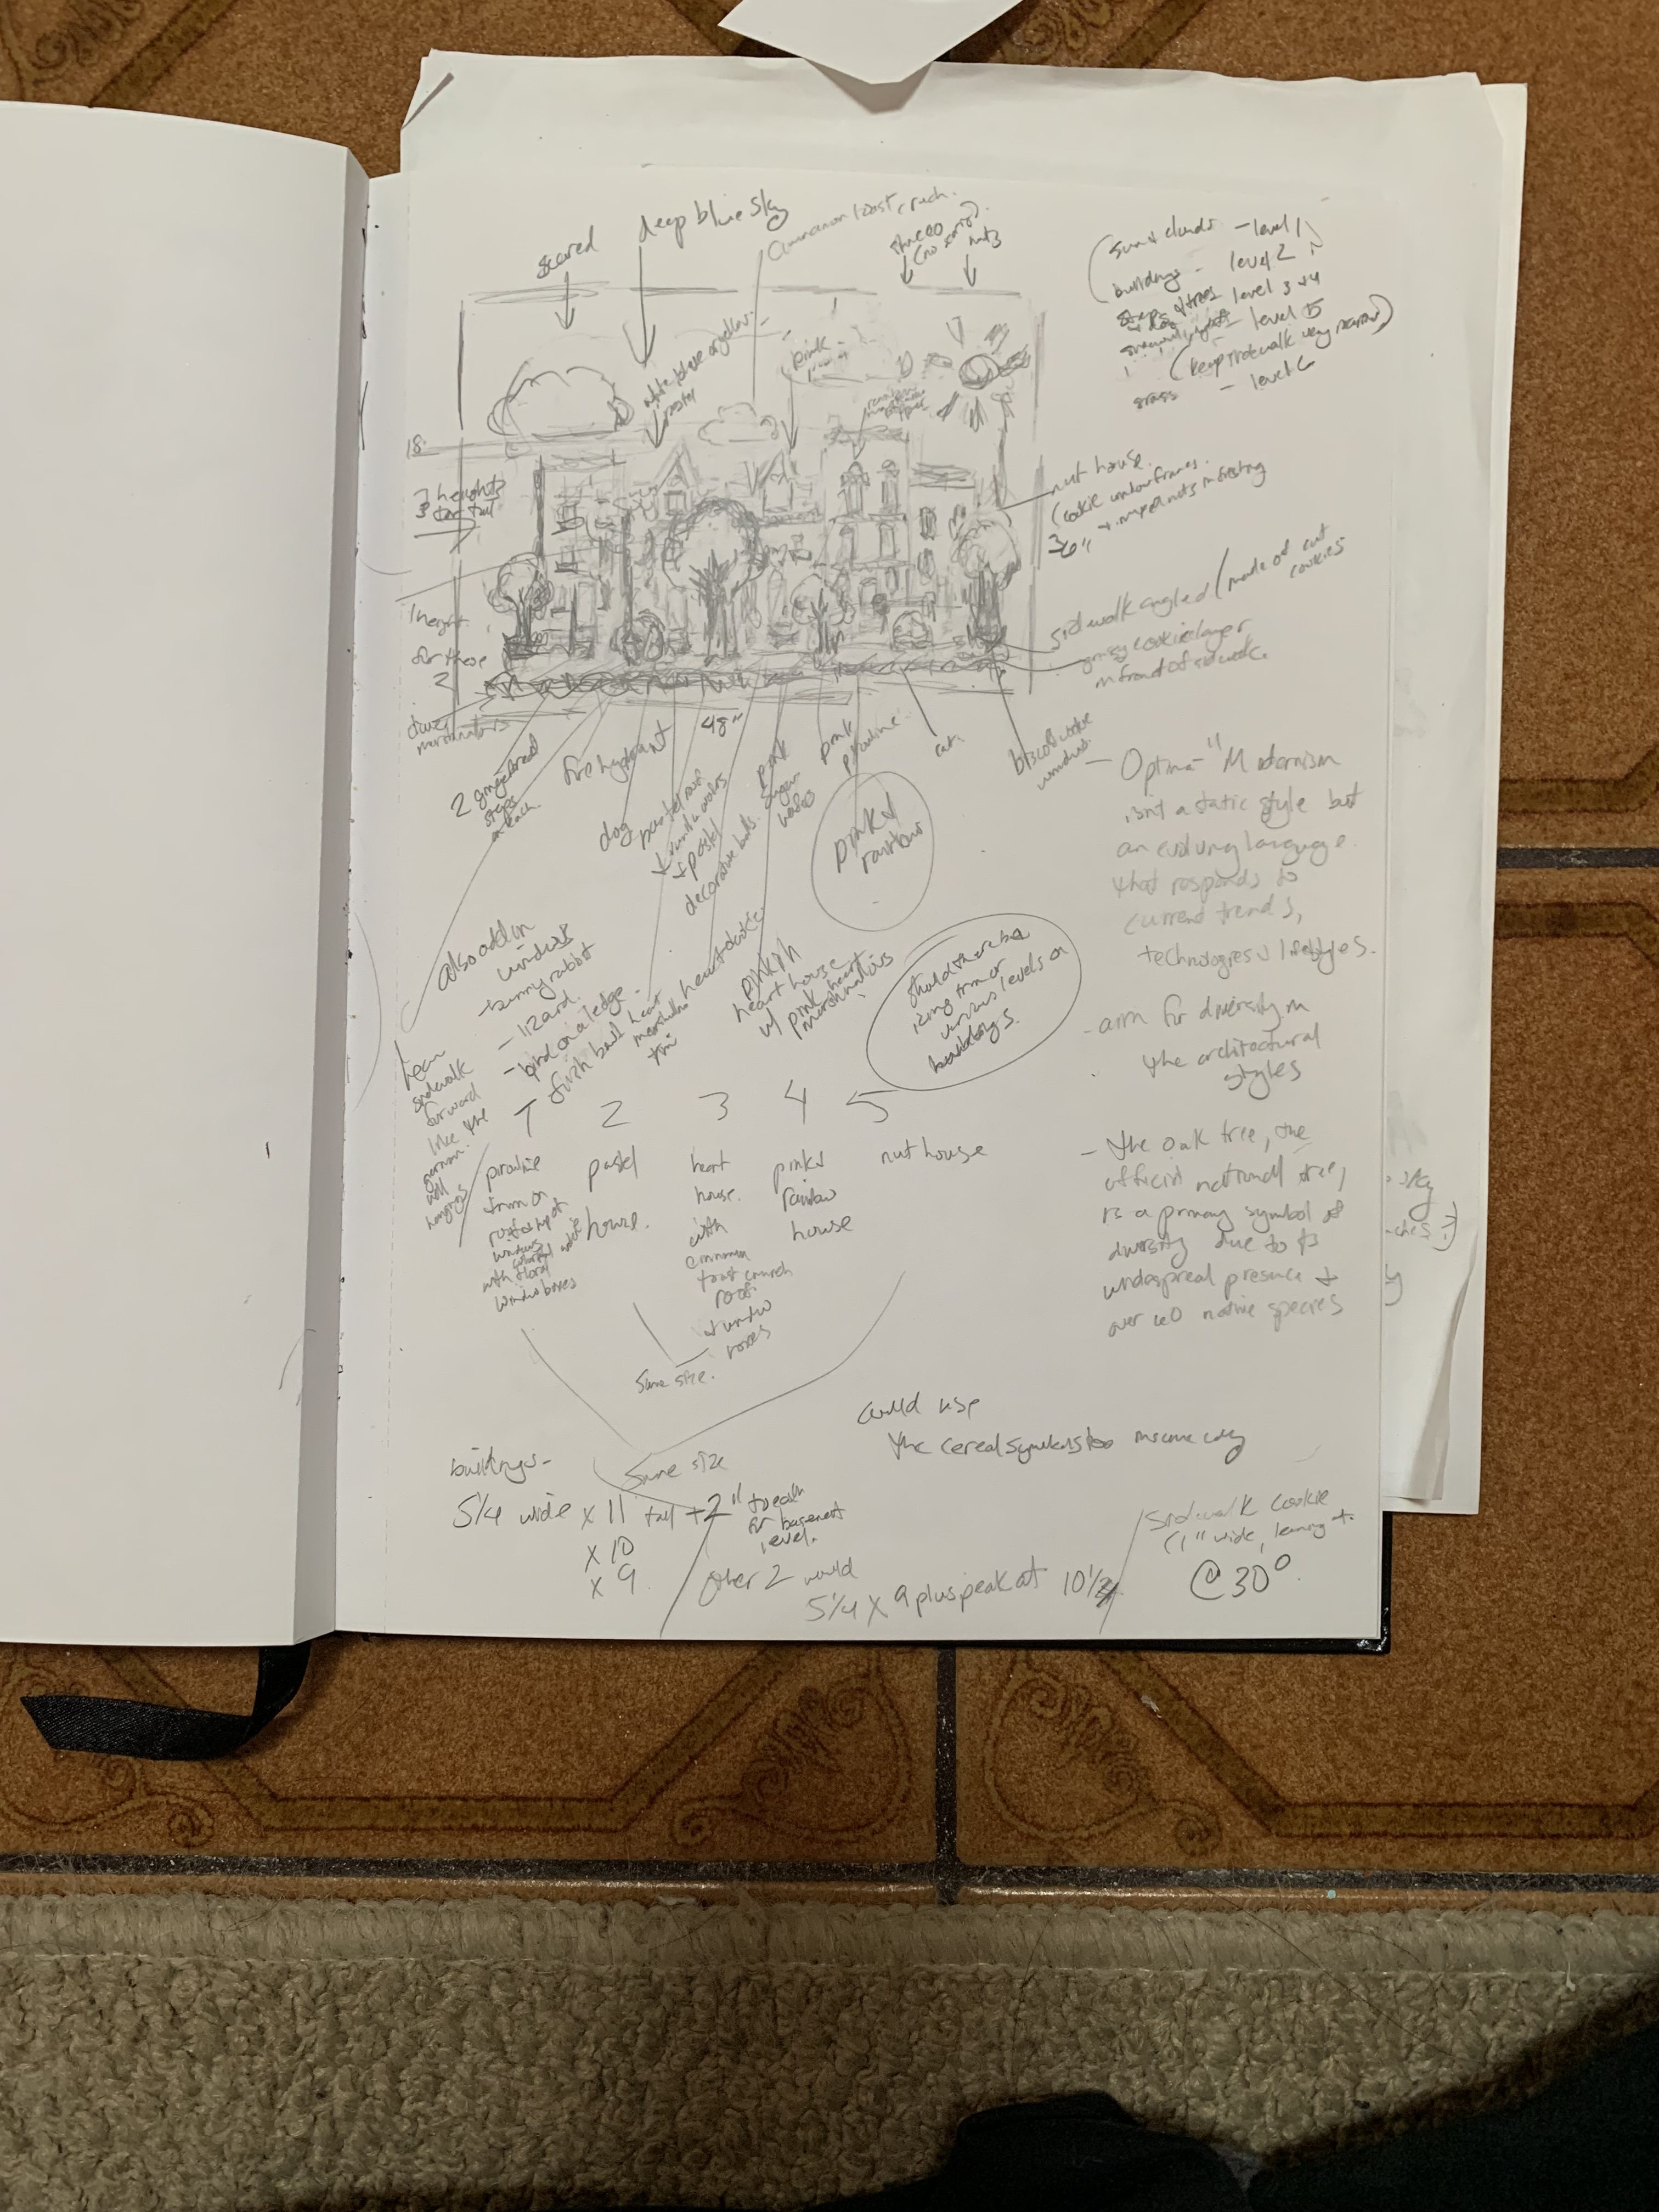
After many sketches over the months, I arrived at something pretty close to what I wanted to make. Next, I had to bring it to life, in a way that was going to work on the large scale I was going to make the painting, which was 3-feet-tall by 4-feet-wide. It had to be well-planned, and since I’d be cutting all of the cookies from scratch, I’d have to create templates for them using cardstock. I began cutting and laying out shapes on the floor until I had something that was going to be the proper width and height overall, with my model at about 3-feet-wide, which I would then scale up.
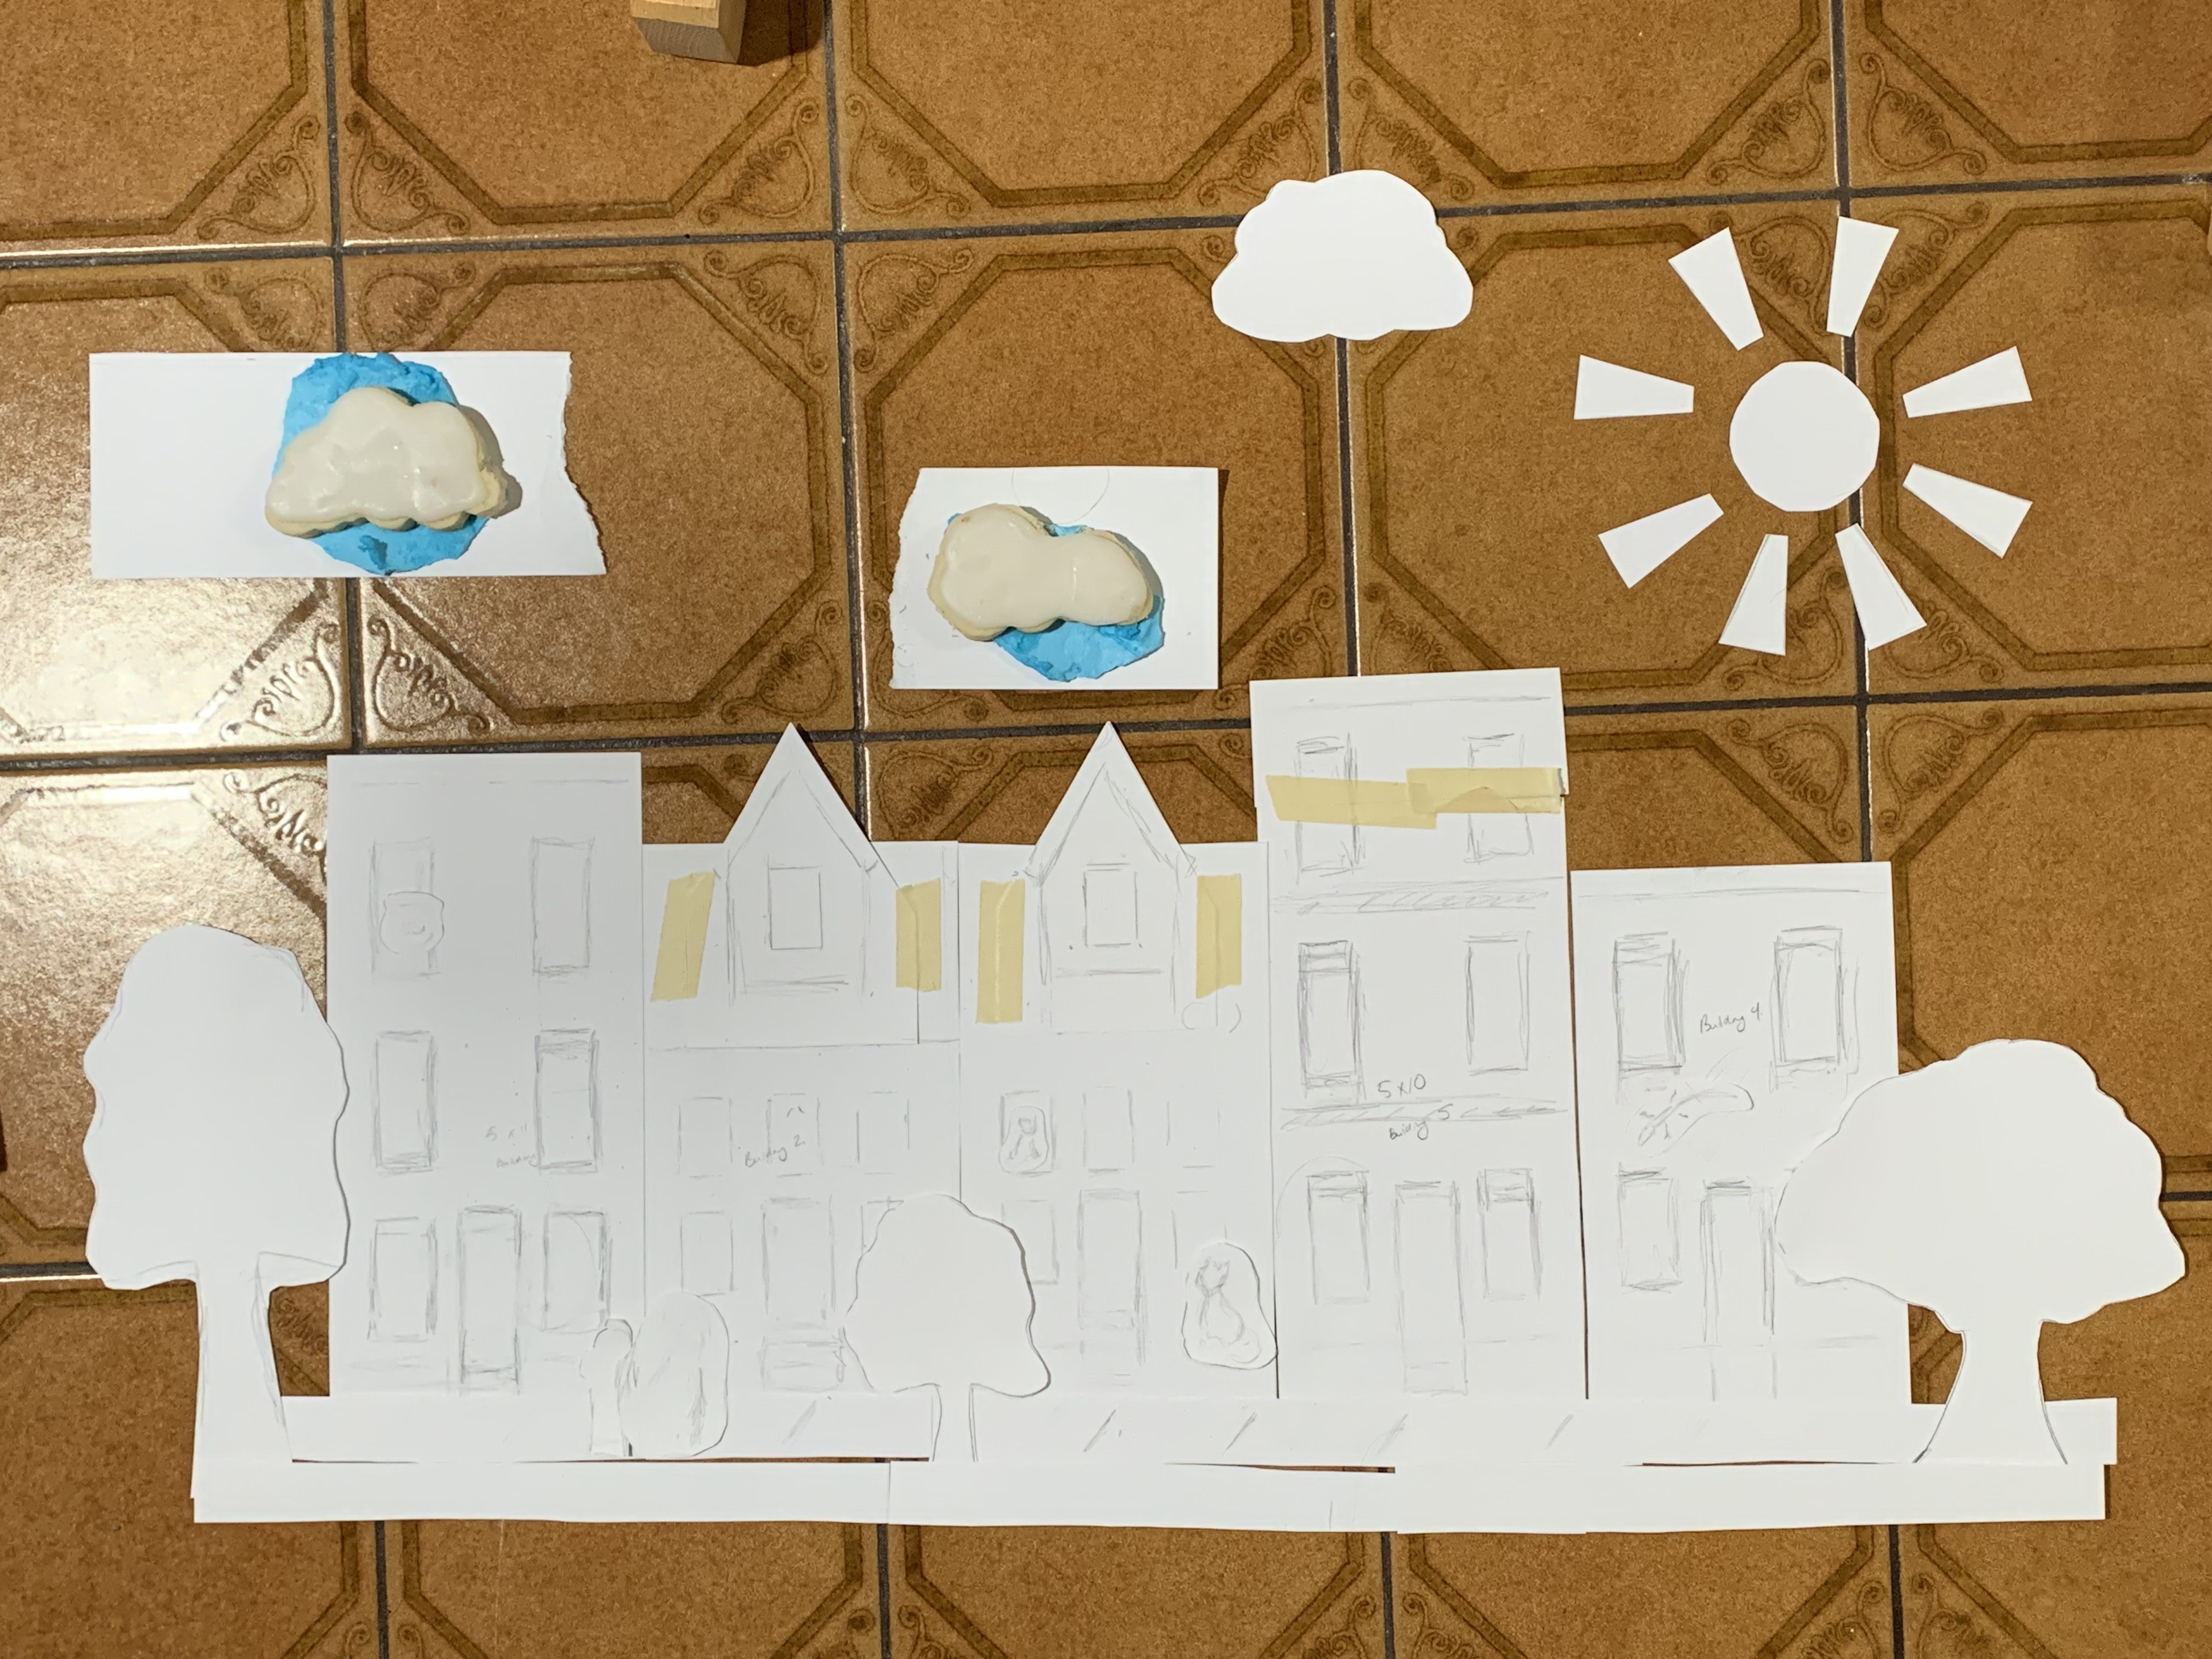
To create a stable base for the cookie model that I could move around to photograph in different light when trying to obtain my reference photo, I taped a few pieces of foamboard together. I knew the model was going to be a bit heavy, so I ensured that the foam board had an extra piece on the back that could withstand the weight of everything.
Baking and Decorating the Model
I’ve frequently been accused online of using AI in some way, shape or form for my paintings. It’s a little bit tough on my spirit to hear this. While I don’t want to insult or demean what other artists choose to do, I want to make sure it’s very clear that every part of my art is human-made: the design, the model and the painting. For me, that is what makes art important and what makes it connect with both the artist and the viewer.
And so, I bake and decorate my own real-life models for my trompe l’oeil food paintings. Sometimes this takes a day or two. For “Beautiful Day in the Neighborhood,” it took me several days — almost a full week — just to build the model. I mixed the doughs and baked all of the gingerbread and sugar cookies. I mixed up all of the frosting colors. I gathered up all of the extra decorations, which in this case was:
- a box of Lucky Charms cereal (I used the heart marshmallows for the roof of the third building, the various “lucky” marshmallows as decorations above each building’s doorway, and the non-marshmallow cereal mixed with green frosting for all of the shrubs, window boxes and trees)
- a box of Cinnamon Toast Crunch Cereal (I used this as the blocks on the first building, the “brownstone,” plus around some of the doorways)
- a rolled chocolate wafer cookie (decoration at the top of the “brownstone”)
- Necco candy wafers (the roof the second building)
- a can of mixed nuts (for the last building)
- Jolly Ranchers candy (which I crushed and baked into the windows, to create the translucent color look)
Informally, I referred to the buildings, in order, as the “brownstone,” the pastel house, the heart house, the rainbow house and the nut house.
This TikTok video shares clips of the entire baking process:
Extra Touches of Whimsy
I just want to point out a few things that I added in the design that gave it the extra flair I was looking for.
- First, my puffy white cloud cookies, which were actually butterfly wings broken off from other unused cookies I’d previously baked.
- The oak trees. These were some of my favorite things, but they were incredibly difficult to paint! They were basically dry Lucky Charms cereal mixed with green frosting, and a brown frosting trunk that I hand-swirled designs into before painting.
- The animals. There are six animals in all — four in the windows, two as cookies. To make the window animals, I put a design on the back of the candy window, that just slightly showed through the colors. The dog and two cats were actually based on my sister’s pets. The bunny in the top window of the “heart” house was an accident, actually — it was a blob of frosting on the back of the window during the model-building process that I thought looked a lot like a bunny! There is a fish in the first window, which, to me, just seemed right for the “brownstone.” And the lizard in the “nut” house window? Well, that just seemed to fit, too.
Here’s a TikTok video of me narrating a few of these details and showing them in the final painting.
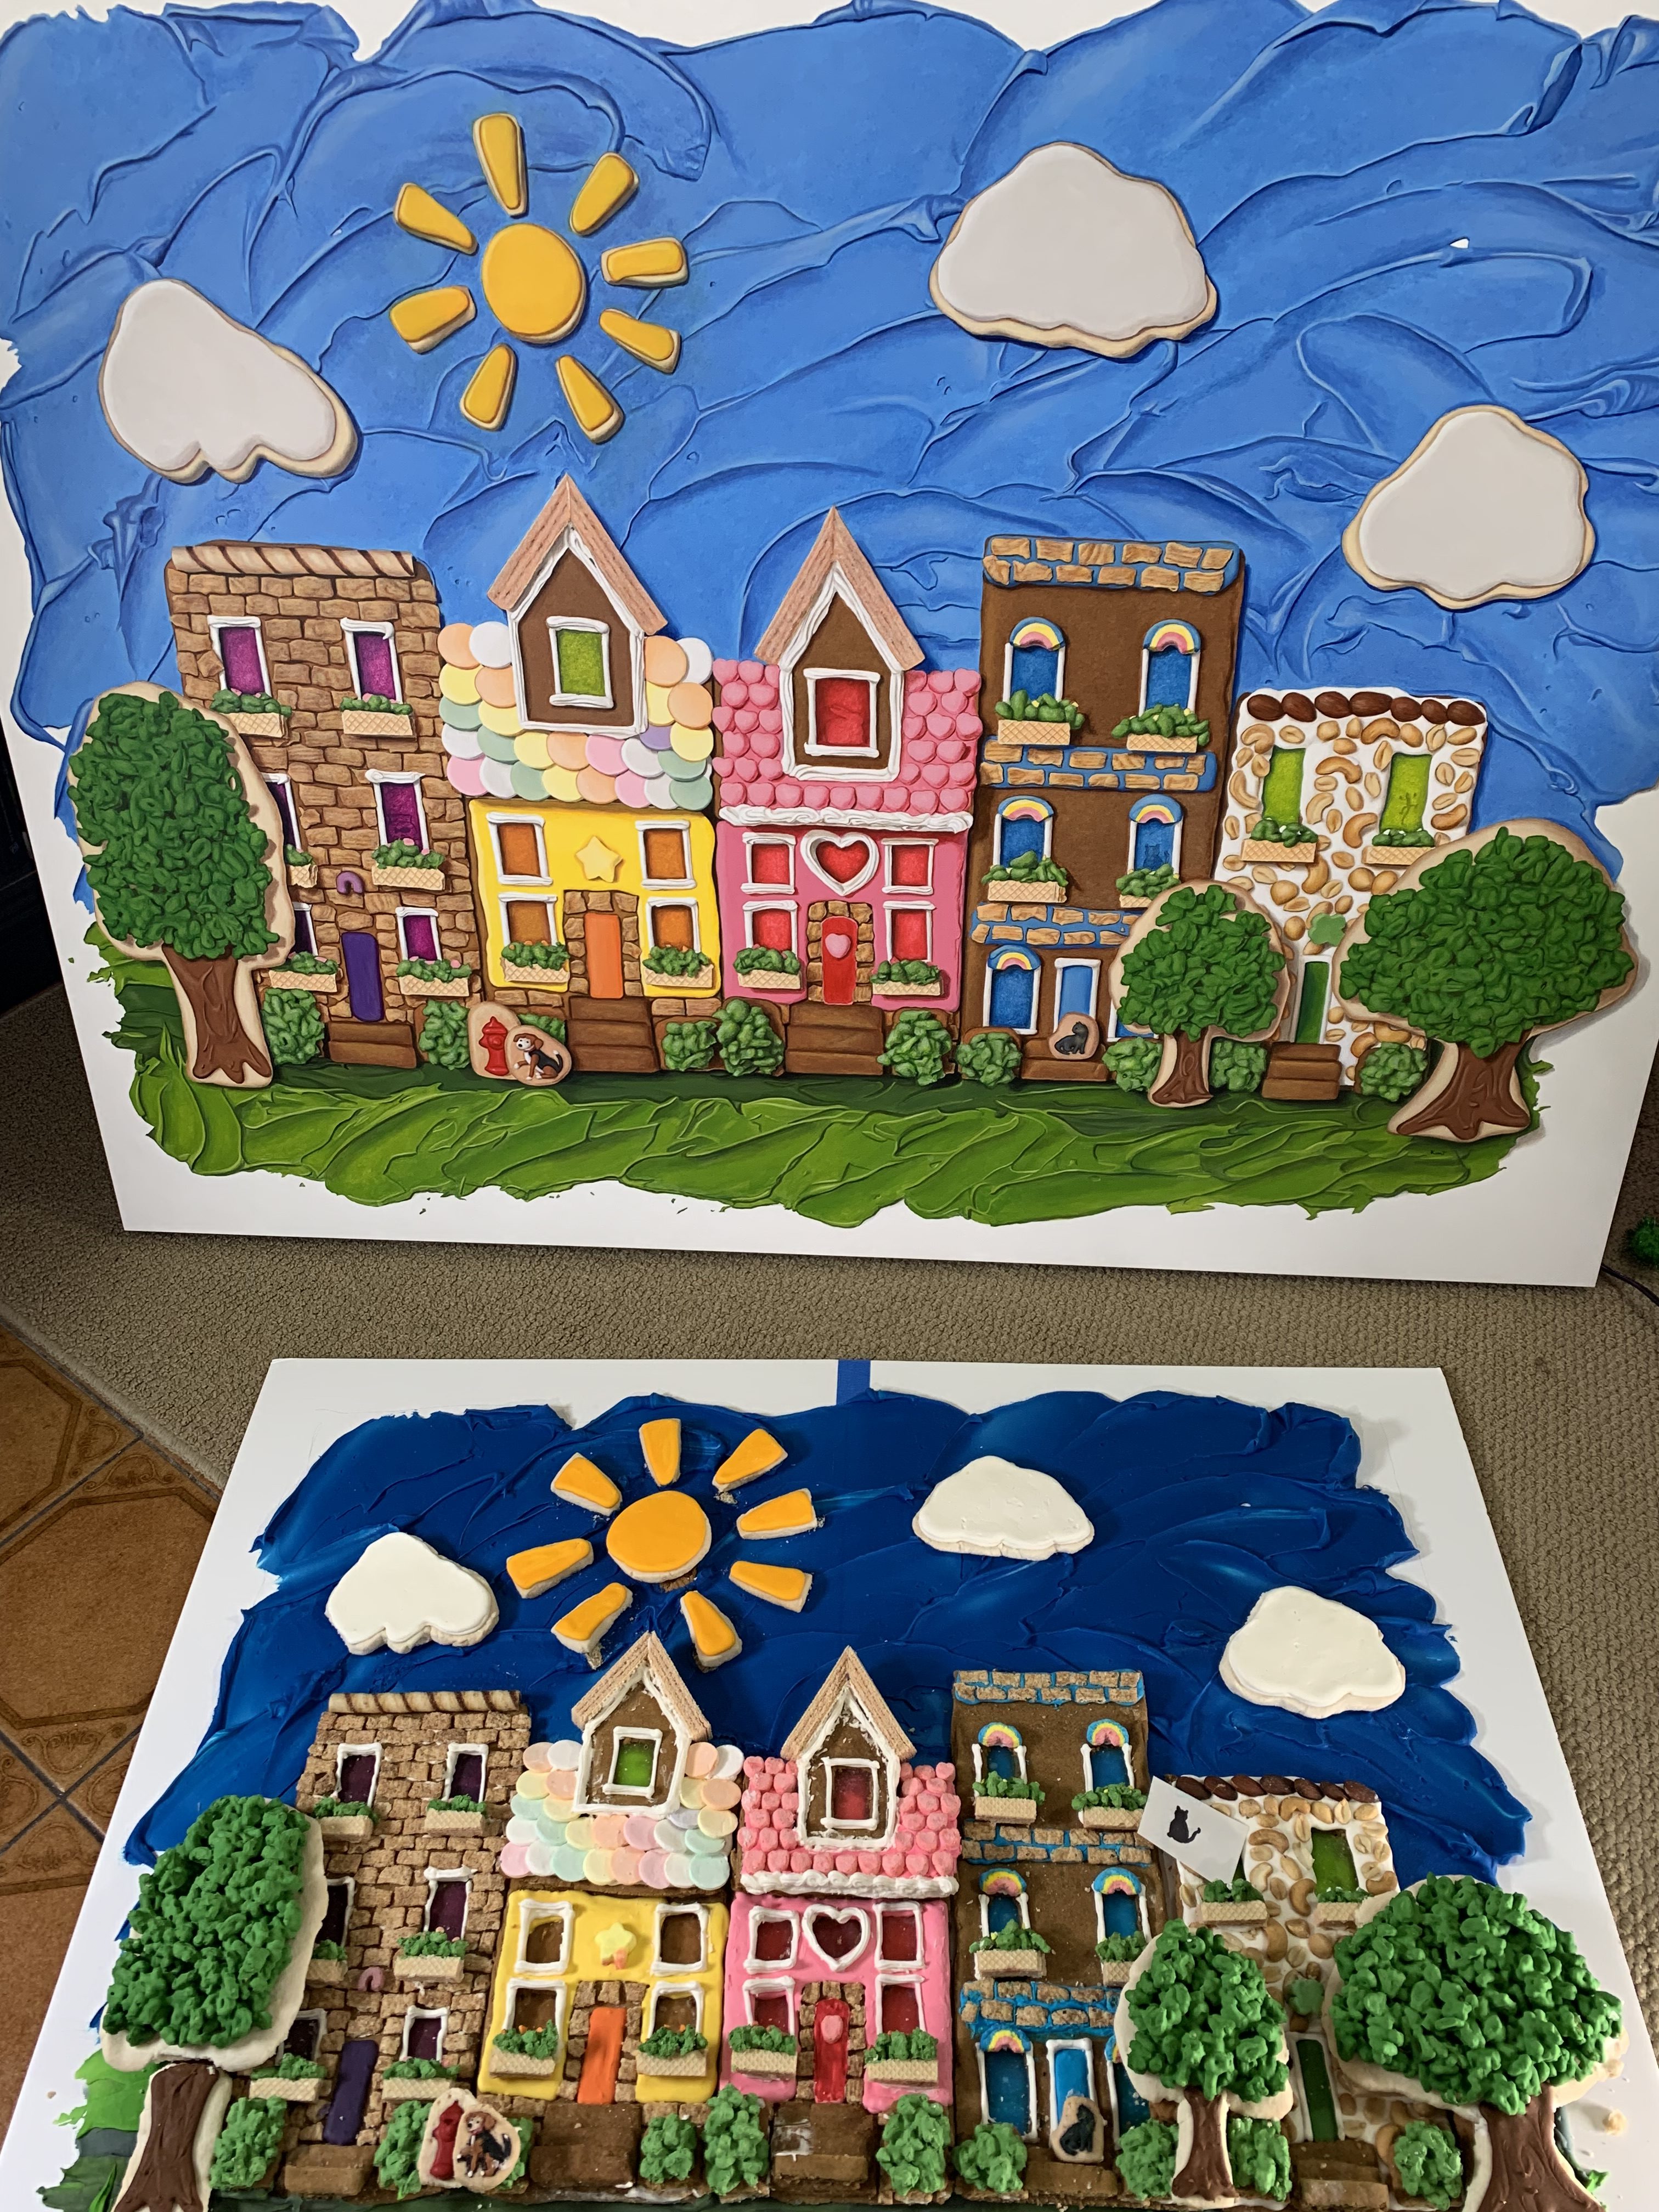
Things I Changed in the Painting
If you compare the real-life model above to the painting, you’ll probably notice the two biggest changes I made: the color of the frosting sky (which was way darker than I wanted, so I lightened it for the painting) and the size of the sun (which was too big overall, so I shrunk it. Everything else pretty much stayed the same. Of course, whenever I use something from real-life as a reference, I always make slight changes as I go, straightening parts up, neatening things up, eliminating and simplifying some rough-shaped areas. Overall, though, I wanted to make the painting as detailed as possible.
In the next and final post, I’ll cover the actual painting process for the piece, which was literally hundreds of hours. But don’t worry — I’ll just summarize it for you!
Back to painting!
Kim T.
- Showing 40-Plus Years of My Art on Twitch Today: Proof that Artists Can Progress… – July 24, 2026
- We’re Going to Paint a Tiny Ice Cream Bar on Twitch Today – June 15, 2026
- We’re a Go for Twitch Painting Livestreams – June 12, 2026


Leave a Reply